Last updated November 18, 2026


Free written scope consultation - allowances, timeline, and change-order rules on paper before a single trade is scheduled
Fence Installation Maintenance Schedule: What to Do and When
Applying a UV-protective stain to a wood fence on the wrong schedule costs the same $3 – $5 per linear foot as a correctly timed application but delivers a fraction of the protective lifespan. The product is identical; the timing is not. We’ve watched Santa Ana homeowners spend a Saturday in June sealing cedar that was still holding 22% moisture after a wet spring, then wonder why the finish flaked off by October. Wood, vinyl, and metal fences fail in completely different ways and need completely different calendars. This guide gives you the schedule for each material, the specific product types that hold up in Southern California’s UV environment, and the annual hardware-and-post checks most people skip.
Quick Answer
Fence maintenance schedules depend entirely on material: cedar and redwood get inspected every spring and stained once moisture drops below 19%, pressure-treated pine needs a brightener plus stain every 2 – 3 years, vinyl needs an annual wash and hardware check only, powder-coated aluminum needs touch-up paint wherever the coating chips, and wrought iron needs annual rust inspection and spot treatment. Every fence, regardless of material, should have its gate hardware and post bases checked once a year before summer.
Styles & brands we work with
- Kitchen remodeling
- Bathroom remodeling
- Home additions & ADU
- Roofing
- Windows & doors
- Driveway & pavers
- Fence
Table of Contents
- Why One Schedule Doesn’t Fit Every Material
- Cedar and Redwood: The Moisture-Content Rule
- Pressure-Treated Pine: The Southern California Exception
- Vinyl: What to Check and What to Ignore
- Powder-Coated Aluminum and Wrought Iron
- The Annual Gate Hardware Checklist
- Post Base Inspection: The 15-Minute Annual Protocol
- Cost-Per-Year Maintenance Budget by Fence Type
Why One Schedule Doesn’t Fit Every Material
The fence maintenance calendar your neighbor follows may be actively wrong for your fence. Cedar and redwood move with moisture. Vinyl expands and contracts with heat but doesn’t rot. Powder-coated aluminum doesn’t absorb anything. Wrought iron is the opposite of wood: it fails at the coating breach, not the substrate. Treating them all with the same “inspect once a year, clean when it looks dirty” approach means you’ll stain wood too early, skip the only check that matters on aluminum, and miss the rust bloom starting at a wrought iron weld before it pits the steel.
Santa Ana’s climate adds a wrinkle most national maintenance advice ignores. Our inland location gets hot summers with intense UV exposure – roughly 280 sunny days a year – but also cool coastal fog that pushes morning humidity high, especially in neighborhoods like Washington Square and French Park. That combination stresses wood finishes harder than either extreme alone. The sun degrades the finish, the fog re-wets the wood, and the cycle repeats. Vinyl fences in Santa Ana also take more UV than the same fence in a coastal or inland-valley market: they’ll need washing more often because dust and pollen bond to sun-warmed surfaces faster.
The practical takeaway: build your schedule around your specific material, then adjust the frequency for our climate. If you haven’t installed the fence yet, it’s worth talking through materials with us before committing – see our Fence Installation in Santa Ana page for how we match material to yard use.
Cedar and Redwood: The Moisture-Content Rule
Cedar and redwood are the two woods that reward patience and punish impatience more than any other fencing material. Both are natural, rot-resistant, and finish beautifully with a penetrating oil stain – but only if the wood is dry enough to accept it. The single number that governs your entire stain schedule is moisture content. Stain applied above 19% traps water under the finish and causes peeling, bubbling, and premature gray. Stain applied after the wood has already gone gray and surface-checked (fine cracks opened by UV) will not penetrate – it just sits on top and flakes.
How to Test Moisture Content
- Buy or borrow a pin-type moisture meter – inexpensive models run $30 – $80 and pay for themselves on the first application.
- Push the pins into the wood at least 1/4 inch, in three separate boards, on the side that gets the most sun.
- Read the meter. Under 19% is safe to stain. Above 19%, wait. New cedar installed in a Santa Ana summer can drop below 19% in as little as four to six weeks; after a wet spring, that can stretch to three months.
- Re-test every two weeks until it reads consistently below 19% across multiple boards.
The Cedar and Redwood Annual Calendar
- March – April: Inspect for winter damage. Look for loose fasteners, cracked boards at the top rail, and any gray patches (a sign the finish is failing). Test moisture content before any stain work.
- May – June: If moisture reads below 19%, apply a penetrating oil or hybrid alkyd stain. In our UV environment, a two-coat application at $3 – $5 per linear foot typically buys 2 – 3 years before reapplication; a single thin coat buys 12 – 18 months at best. Products formulated for high-UV climates (penetrating oils with UV inhibitors, not surface film-formers) perform much better here than film-forming stains that crack.
- September: Walk the fence after the hottest months. Any spot that looks dry, faded, or is starting to gray will need spot treatment before winter rains.
- December: Clear soil and debris from the base of the fence so the bottom rail can dry. Standing moisture at the base is the single biggest cause of premature rot.
Pressure-Treated Pine: The Southern California Exception
Pressure-treated pine is the most common fence material in Santa Ana, and the most misunderstood when it comes to maintenance. The preservative treatment (typically ACQ or MCA) is not a finish; it’s a chemical barrier against rot and insects. It does not protect against UV – the wood will gray within a year if left unfinished. But unlike cedar, pressure-treated pine needs a longer curing period before it can accept a stain, and the treatment chemicals themselves can bleed and interfere with adhesion.
The schedule we recommend for pressure-treated pine in Santa Ana is a 2 – 3 year cycle, punctuated by a brightener step most homeowners skip. Graying, mill glaze, and the powdery residue left by dried treatment chemicals all block stain penetration. A wood brightener (an oxalic-acid-based product) restores the wood’s natural tone and opens the grain before staining. Skipping it is the single most common reason pressure-treated fences in Santa Ana look chalky or patchy after a fresh coat.
Pressure-Treated Pine Calendar
- Spring (2 – 3 year cycle): Wash the fence with a pump sprayer and a mild detergent, then apply brightener, then test moisture. Once below 19%, apply a penetrating oil stain or a semi-transparent acrylic formulated for treated wood. Expect $2.50 – $4.50 per linear foot in materials plus labor if you hire.
- Every year: Probe the bottom rail and post bases (see the post base protocol below). Pressure-treated pine still rots where water reaches untreated cuts and end grain, especially at ground contact points.
- Every fall: Check for pop-out nails and re-drive or replace with coated deck screws. As treated boards shrink and swell, fasteners work loose; a loose board traps water.
If your fence is on its last legs – leaning posts, widespread rot, boards warped beyond a coat of stain – it’s often cheaper to replace than to repair. Our guide on Driveway & Pavers in Santa Ana covers matching a new fence line to a new hardscape if you’re planning both in the same season.
Vinyl: What to Check and What to Ignore
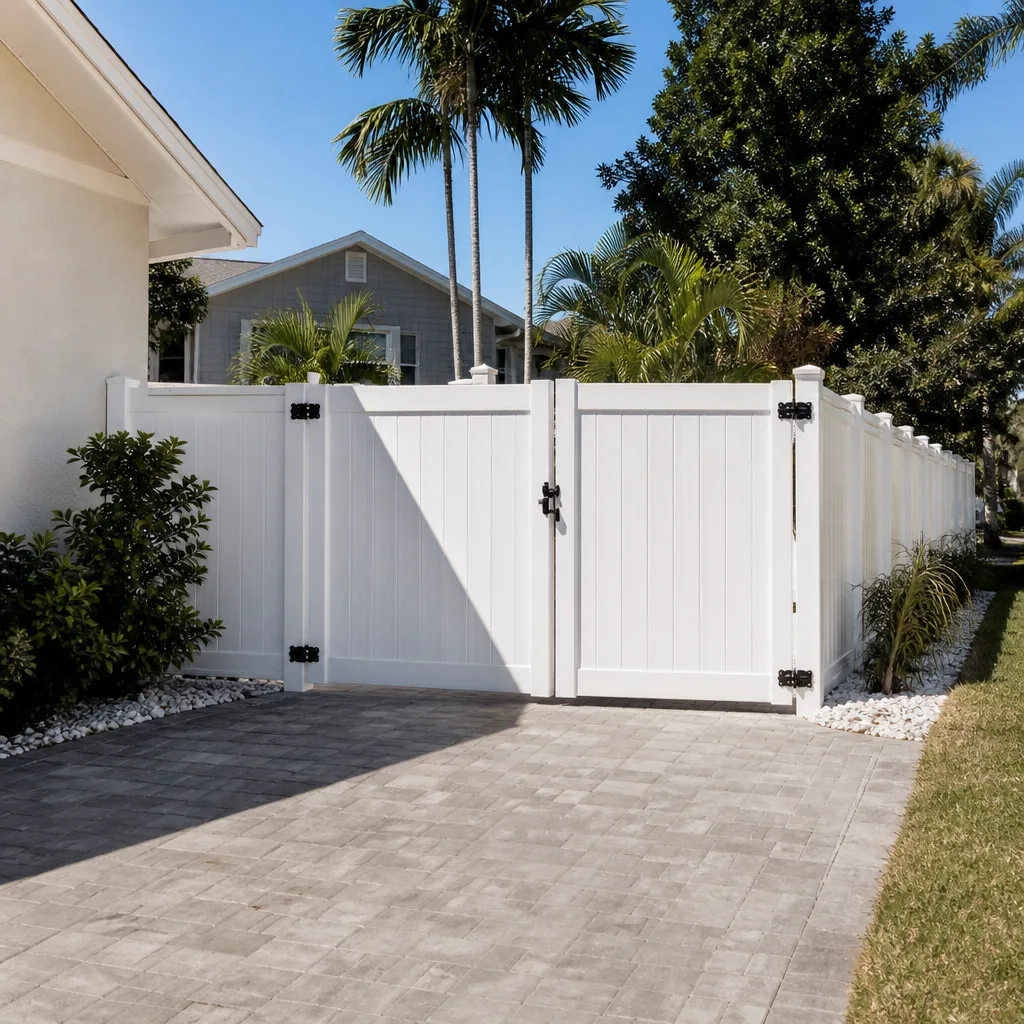
Vinyl fencing has almost no maintenance schedule in the traditional sense – no staining, no sealing, no rot. What it does have is a hardware and expansion schedule. Vinyl expands and contracts significantly with temperature; in Santa Ana, that means a fence installed in January can look tight and perfectly aligned in March and then develop visible gaps at panel seams by July. Those gaps are not a failure; they’re expansion joints doing their job. But the hardware and structural connections around them do need checking.
Vinyl Annual Calendar
- Spring: Wash with a garden hose and a soft brush plus mild soap. Avoid pressure washing at full force – high-pressure water forces dirt into the grain texture and can pit older vinyl. In Santa Ana’s dusty inland climate, one or two washings a year keeps the fence white.
- Late spring: Inspect the aluminum reinforcement inside the bottom rail and posts. Most quality vinyl fences use a metal insert for rigidity, and where that insert touches moisture or soil it can corrode. Check that fasteners are snug; loose fasteners let panels rattle in wind.
- Summer: Look for one or two panels that have visibly bowed or pulled out of the rails. This usually means the expansion gap at installation was cut too tight. Fixing it is a matter of re-seating the panel with a proper gap, not replacing it.
- Fall: Repeat the hardware check. Vinyl fences with gates get the most wear here (see gate hardware checklist below).
What you can ignore: yellowing (modern vinyl formulations with UV stabilizers don’t yellow the way older products did, though they may show surface haze over decades), “sealing” the vinyl (unnecessary and can void warranties), and any advice suggesting vinyl needs a stain. It doesn’t.
Powder-Coated Aluminum and Wrought Iron
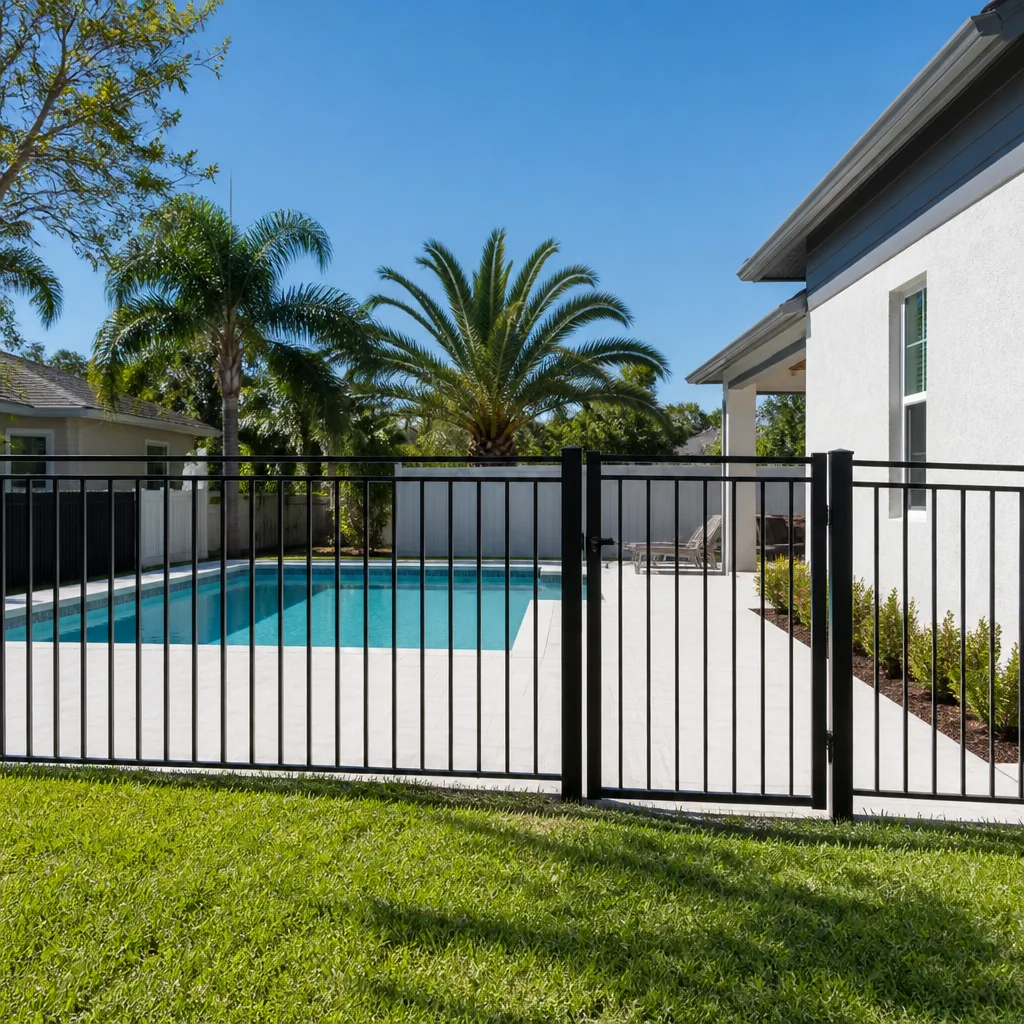
These two materials look similar in photos and behave completely differently. Powder-coated aluminum is the low-maintenance option – the factory-applied powder coat is a tough, baked-on finish that resists UV, chips only on impact, and rarely needs more than a wash. Wrought iron is the high-maintenance metal: it’s typically finished with a sprayed or hand-applied paint over bare steel, and every scratch, chip, or weld seam is a rust entry point.
Powder-Coated Aluminum Calendar
- Spring and fall: Wash with mild soap and water. Don’t use abrasive pads or solvents; they dull the finish.
- Annually: Walk the fence and look for chips, scratches, or areas where the coating has worn through – typically at gate hardware contact points and where the fence meets concrete. Touch up with color-matched touch-up paint. A chip left untreated lets the aluminum oxidize and eventually pit, which is a much bigger repair.
- Every 2 – 3 years: Lubricate hinges, latches, and any moving parts with a dry lubricant (PTFE or silicone-based). Oil-based lubricants collect Santa Ana’s dust and gum up.
Wrought Iron Calendar
- Spring: Inspect every linear foot for rust bloom (orange-brown spots), especially at the bottom of posts, around weld seams, and at the base plate where the post meets concrete. That last spot is where wrought iron rusts first and worst.
- Spring, cont.: Treat any rust you find immediately. Sand to bare metal, apply a rust converter (an acid-based product that converts iron oxide into a paintable black surface), then paint with a direct-to-metal paint formulated for exterior steel. A rust converter is the quiet hero here: treating a blooming spot early adds years to the fence, while ignoring it means the rust pits through the 1/8-inch steel wall within a few seasons.
- Fall: Re-inspect; any spot that’s flash-rusting again needs another treatment, which tells you the original coating isn’t holding moisture out.
- Every 3 – 5 years: Repaint the entire fence. Spot touch-up extends the interval; eventually the whole fence needs a fresh coat.
The Annual Gate Hardware Checklist
Gates are the first part of every fence to fail, and the failure almost always starts as a small hardware slip that compounds. A hinge bolt that’s backed out a quarter-turn lets the gate sag a half-inch; the sag misaligns the latch; the latch drags; someone forces it; the latch breaks. Catching the loose bolt takes two minutes. Replacing a latch takes an hour and a trip to the hardware store.
We recommend the check once a year, in late spring, before the hottest months. Walk through these steps:
- Hinge bolt torque: Confirm every hinge bolt is tight with a wrench or socket. Don’t just check visually – a backed-out bolt can look seated. Torque to snug (not cranked), and check the hinge plates for movement against the post.
- Latch alignment: Close the gate slowly. The latch should engage without force and without you lifting or swinging the gate. If it drags or misses, the gate is sagging on its hinges – fix the hinge before the latch.
- Anti-sag cable tension: Many vinyl and wood gates use a diagonal cable with a turnbuckle to counter sag. Check the cable for slack. If it’s slack enough to flex visibly with light hand pressure, tighten the turnbuckle a quarter-turn at a time until the gate’s top rail pulls slightly above level (a 1/8-inch “over-lift” compensates for future sag).
- Post attachment: Push and pull the gate post firmly in all four directions. Any movement at the base means the post footing is compromised – a much bigger issue than hardware, and worth having inspected before it fails.
- Self-closing and self-latching: If you have a self-closing gate (required for pools in California and common on residential drive gates), confirm it still closes and latches on its own from a partially open position. Adjust the closer or the hinge spring as needed.
Post Base Inspection: The 15-Minute Annual Protocol
The base of every post is where fence failure starts. Wood posts rot at the soil line. Metal posts corrode where the weld meets the base plate. Vinyl posts trap debris. A fifteen-minute walk around the fence once a year, probing the base of every post, catches problems while they’re still cheap to fix.
What to do at each post:
- Wood posts: Push a screwdriver or awl into the wood at the soil line and just above it. A healthy post resists firm pressure; a post that yields or feels soft is rotting from the inside. Rot below the grade line means the post needs replacement – stop-gap rot treatments sold at hardware stores don’t work once rot has passed the protective treated zone. If you catch early-stage rot near the surface, drilling and inserting borate rods (a slow-release treatment for wood rot) into sound wood next to the rot can halt the spread and buy 5 – 10 years on a post otherwise scheduled for replacement.
- Metal posts (aluminum, wrought iron, steel): Examine the base plate and the first two inches above grade for rust or white corrosion. Use a rust converter on the affected area once you’ve removed loose flaking with a wire brush, then coat with a matching paint. Where the base plate is set into concrete, look for cracks radiating away from the post – that’s a sign of concrete settling and usually means the post footing is failing.
- Vinyl posts: Check that the bottom rail and post sleeve aren’t holding trapped dirt and moisture. A screwdriver down the post sleeve to clear debris once a year helps. Also check the fasteners at the post’s bottom rail; the screws that anchor the rail into the post are the vinyl fence’s weak link.
If a post base is failing, the fix usually means resetting the post in fresh concrete – not a homeowner-sized project for a fence in daily use. Call us at (833) 853-5955 for a free estimate if you find movement or rot during the inspection.
Cost-Per-Year Maintenance Budget by Fence Type
Comparing fence materials by installation price alone hides the real cost. Here’s a realistic annual maintenance budget per 150 linear feet of fence, based on Santa Ana material and labor costs. These are maintenance-only figures – replacement or repair costs run much higher.
- Cedar / redwood: $450 – $750 per year. Stain every 2 – 3 years ($450 – $750 per application, including materials and DIY labor), plus annual inspection time. If hiring a professional, double these figures.
- Pressure-treated pine: $350 – $600 per year. Stain or brightener every 2 – 3 years, plus annual inspection and minor fastener repair.
- Vinyl: $75 – $200 per year. Washing supplies, occasional fastener replacement, and hardware lubrication.
- Powder-coated aluminum: $50 – $150 per year. Touch-up paint, dry lubricant, annual wash.
- Wrought iron: $200 – $400 per year. Spot rust treatment every year, full repaint every 3 – 5 years (at $2,000 – $3,500 for the full repaint, amortized).
The true comparison, then: vinyl has the lowest annual cost, wood has the highest but yields the most attractive fence in our market, and wrought iron sits in the middle. For a fuller view of installation costs by material, our Fence Installation in Santa Ana page breaks down the up-front numbers so you can compare total lifecycle cost against installation price.
Common Mistakes to Avoid
- Staining cedar too early. If moisture is above 19%, the stain will lock water into the wood and peel within a season. A $30 moisture meter and one more week of patience beats a $500 re-do.
- Pressure washing vinyl and painted wood at full force. High-pressure water drives dirt into the vinyl grain and strips paint from wood. Use a hose and soft brush, or a pressure washer at the lowest setting with a wide-tip nozzle.
- Ignoring gate hinge bolts because the gate still looks fine. A quarter-turn of backed-out hinge bolt is invisible until the gate sags. Check the torque once a year whether the gate looks fine or not.
- Painting over rust on wrought iron. Paint won’t stop rust; it traps moisture against the steel. Use a rust converter first, then paint, or the rust will bloom through in a season.
- Skipping the brightener on pressure-treated pine. Mill glaze and dried treatment residue block stain penetration. The brightener step takes an afternoon and extends the stain’s life by a year or more.
- Clear-sealing vinyl. Vinyl does not need and should not receive a clear sealant; it voids most manufacturers’ warranties and can trap dirt against the surface.
- Letting debris collect at post bases. In Santa Ana’s dry season, dust and leaf litter accumulate behind fence posts. During the first winter rain, that debris holds moisture against the base of the post – the exact spot where rot starts.
See the difference
 Before
 After
 Before
 After
 Before
 After
When to Call a Professional
Some maintenance is a homeowner job; some isn’t. Call a pro when you find post movement or rot at the base (resetting a post is a concrete-and-digging project, not a weekend task), when a gate post has started to lean after years of use, when more than a few cedar or redwood boards need replacement due to cracking or checking, or when a rust repair on wrought iron has grown beyond spot touch-ups. If you’re planning a major landscape change, our guide on Home Additions & ADU in Santa Ana covers how fencing fits into larger property work, and our Rowan Construction Group Santa Ana home page lists the trades we handle on a single project.
Rowan Construction Group Santa Ana offers free estimates in Santa Ana – call (833) 853-5955. We’ll walk the fence with you, document what we find with a photo record, and put a written price in your hands before any work starts. Every quote is a flat price with a written scope, and no change order moves forward without your signature. Our 365-Day Done Right Promise backs every job: if it isn’t done right, we make it right.
Frequently Asked Questions
Every 2 – 3 years, once moisture content is below 19%. Our UV exposure is high enough that a single application won’t hold more than three years; reapply in late spring or early summer after the moisture meter reads below 19% across multiple boards. Call (833) 853-5955 for a free estimate if you’d like us to inspect and quote.
No. New pressure-treated lumber needs to weather for several weeks to months before it accepts stain; wait until moisture drops below 19% and treat with a brightener first. In Santa Ana’s dry season that’s often 4 – 6 weeks, but after a wet spring it can take much longer. Testing with a moisture meter tells you exactly when it’s ready.
Probe the base of each post with a screwdriver at the soil line. A healthy post resists firm pressure; a post that feels soft, spongy, or gives way under pressure is rotting – and once rot passes the treated outer layer, the post needs replacement. Call (833) 853-5955 for a free inspection quote if you find soft posts.
Yes, but very little: an annual wash and hardware check. Vinyl doesn’t need staining or sealing, but the metal reinforcement inside the bottom rail and the gate hardware do need inspection. Loose fasteners and tight expansion joints are the two things to watch for.
Every 3 – 5 years for a full repaint, with annual spot touch-ups on rust blooms. The key is treating rust with a rust converter as soon as it appears – ignoring it lets the corrosion pit through the steel in a few seasons. Repainting the whole fence typically runs $2,000 – $3,500 for a 150-foot residential fence in Santa Ana.
Powder-coated aluminum, at roughly $50 – $150 per year in maintenance for a 150-foot fence, followed closely by vinyl. Wood is the most expensive to maintain, but for many Santa Ana homeowners, the appearance is worth the annual cost. Call (833) 853-5955 for a free cost comparison for your specific yard.
The Bottom Line
The best fence maintenance schedule for your yard is built around your material, not a generic checklist. Cedar and redwood need stain timing based on moisture content, not the calendar. Pressure-treated pine needs a brightener before every stain. Vinyl and powder-coated aluminum need washing and hardware checks, not stain. Wrought iron needs annual rust treatment. Every fence, every year, needs the gate hardware check and post base probe – those are the two annual tasks that prevent small problems from becoming expensive ones. Time your schedule right, and you get the full working life out of whatever material you own. Skip the material-specific check, and you’ll do plenty of work without the protection. Call Rowan Construction Group Santa Ana at (833) 853-5955 for a free estimate whenever your fence needs more than routine care.
Written by the team at Rowan Construction Group Santa Ana.